原文链接 http://blog.piasy.com/2018/04/05/WebRTC-iOS-DataChannel/
注:以下为加速网络访问所做的原文缓存,经过重新格式化,可能存在格式方面的问题,或偶有遗漏信息,请以原文为准。
今天给大家带来 WebRTC iOS demo 的工作流程分析(P2P 连接过程),以及 DataChannel 的使用示例。最后,我把 WebRTC iOS demo 的代码从 WebRTC 代码库中摘了出来,并使用 CocoaPods 上 Google 发布的预编译库,GitHub 传送门。
另外,从本篇开始,「WebRTC Android 源码导读」系列正式升级为「WebRTC Native 源码导读」 :)
本文的分析基于 WebRTC 的 #23295 提交。
AppRTCMobile 工作流程
界面入口
- 点击
Start call AppRTCMobile/ios/ARDMainViewController.mmainView:didInputRoom:isLoopbackAppRTCMobile/ios/ARDVideoCallViewController.minitForRoom:isLoopback:delegate
server 交互、P2P 连接
AppRTCMobile/ARDAppClient.mconnectToRoomWithId:settings:isLoopback,访问 apprtc server 加入房间- 创建 RTCPeerConnectionFactory
- 获取 iceServers 配置
AppRTCMobile/ARDTURNClient.mrequestServersWithCompletionHandler - 加入房间
AppRTCMobile/ARDAppEngineClient.mjoinRoomWithRoomId:isLoopback:completionHandler,和 AppRTC-Android 一样,根据房间号、baseUrl 确定访问 apprtc server 的地址 - 获取 iceServers 配置成功以及加入房间成功后,都会尝试
startSignalingIfReady - 加入房间成功后,会调用
registerWithColliderIfReady建立长连接
AppRTCMobile/ARDAppClient.mstartSignalingIfReady,建立 PeerConnection- 创建
RTCPeerConnection对象 createMediaSenders里创建 source, track, stream- 如果是
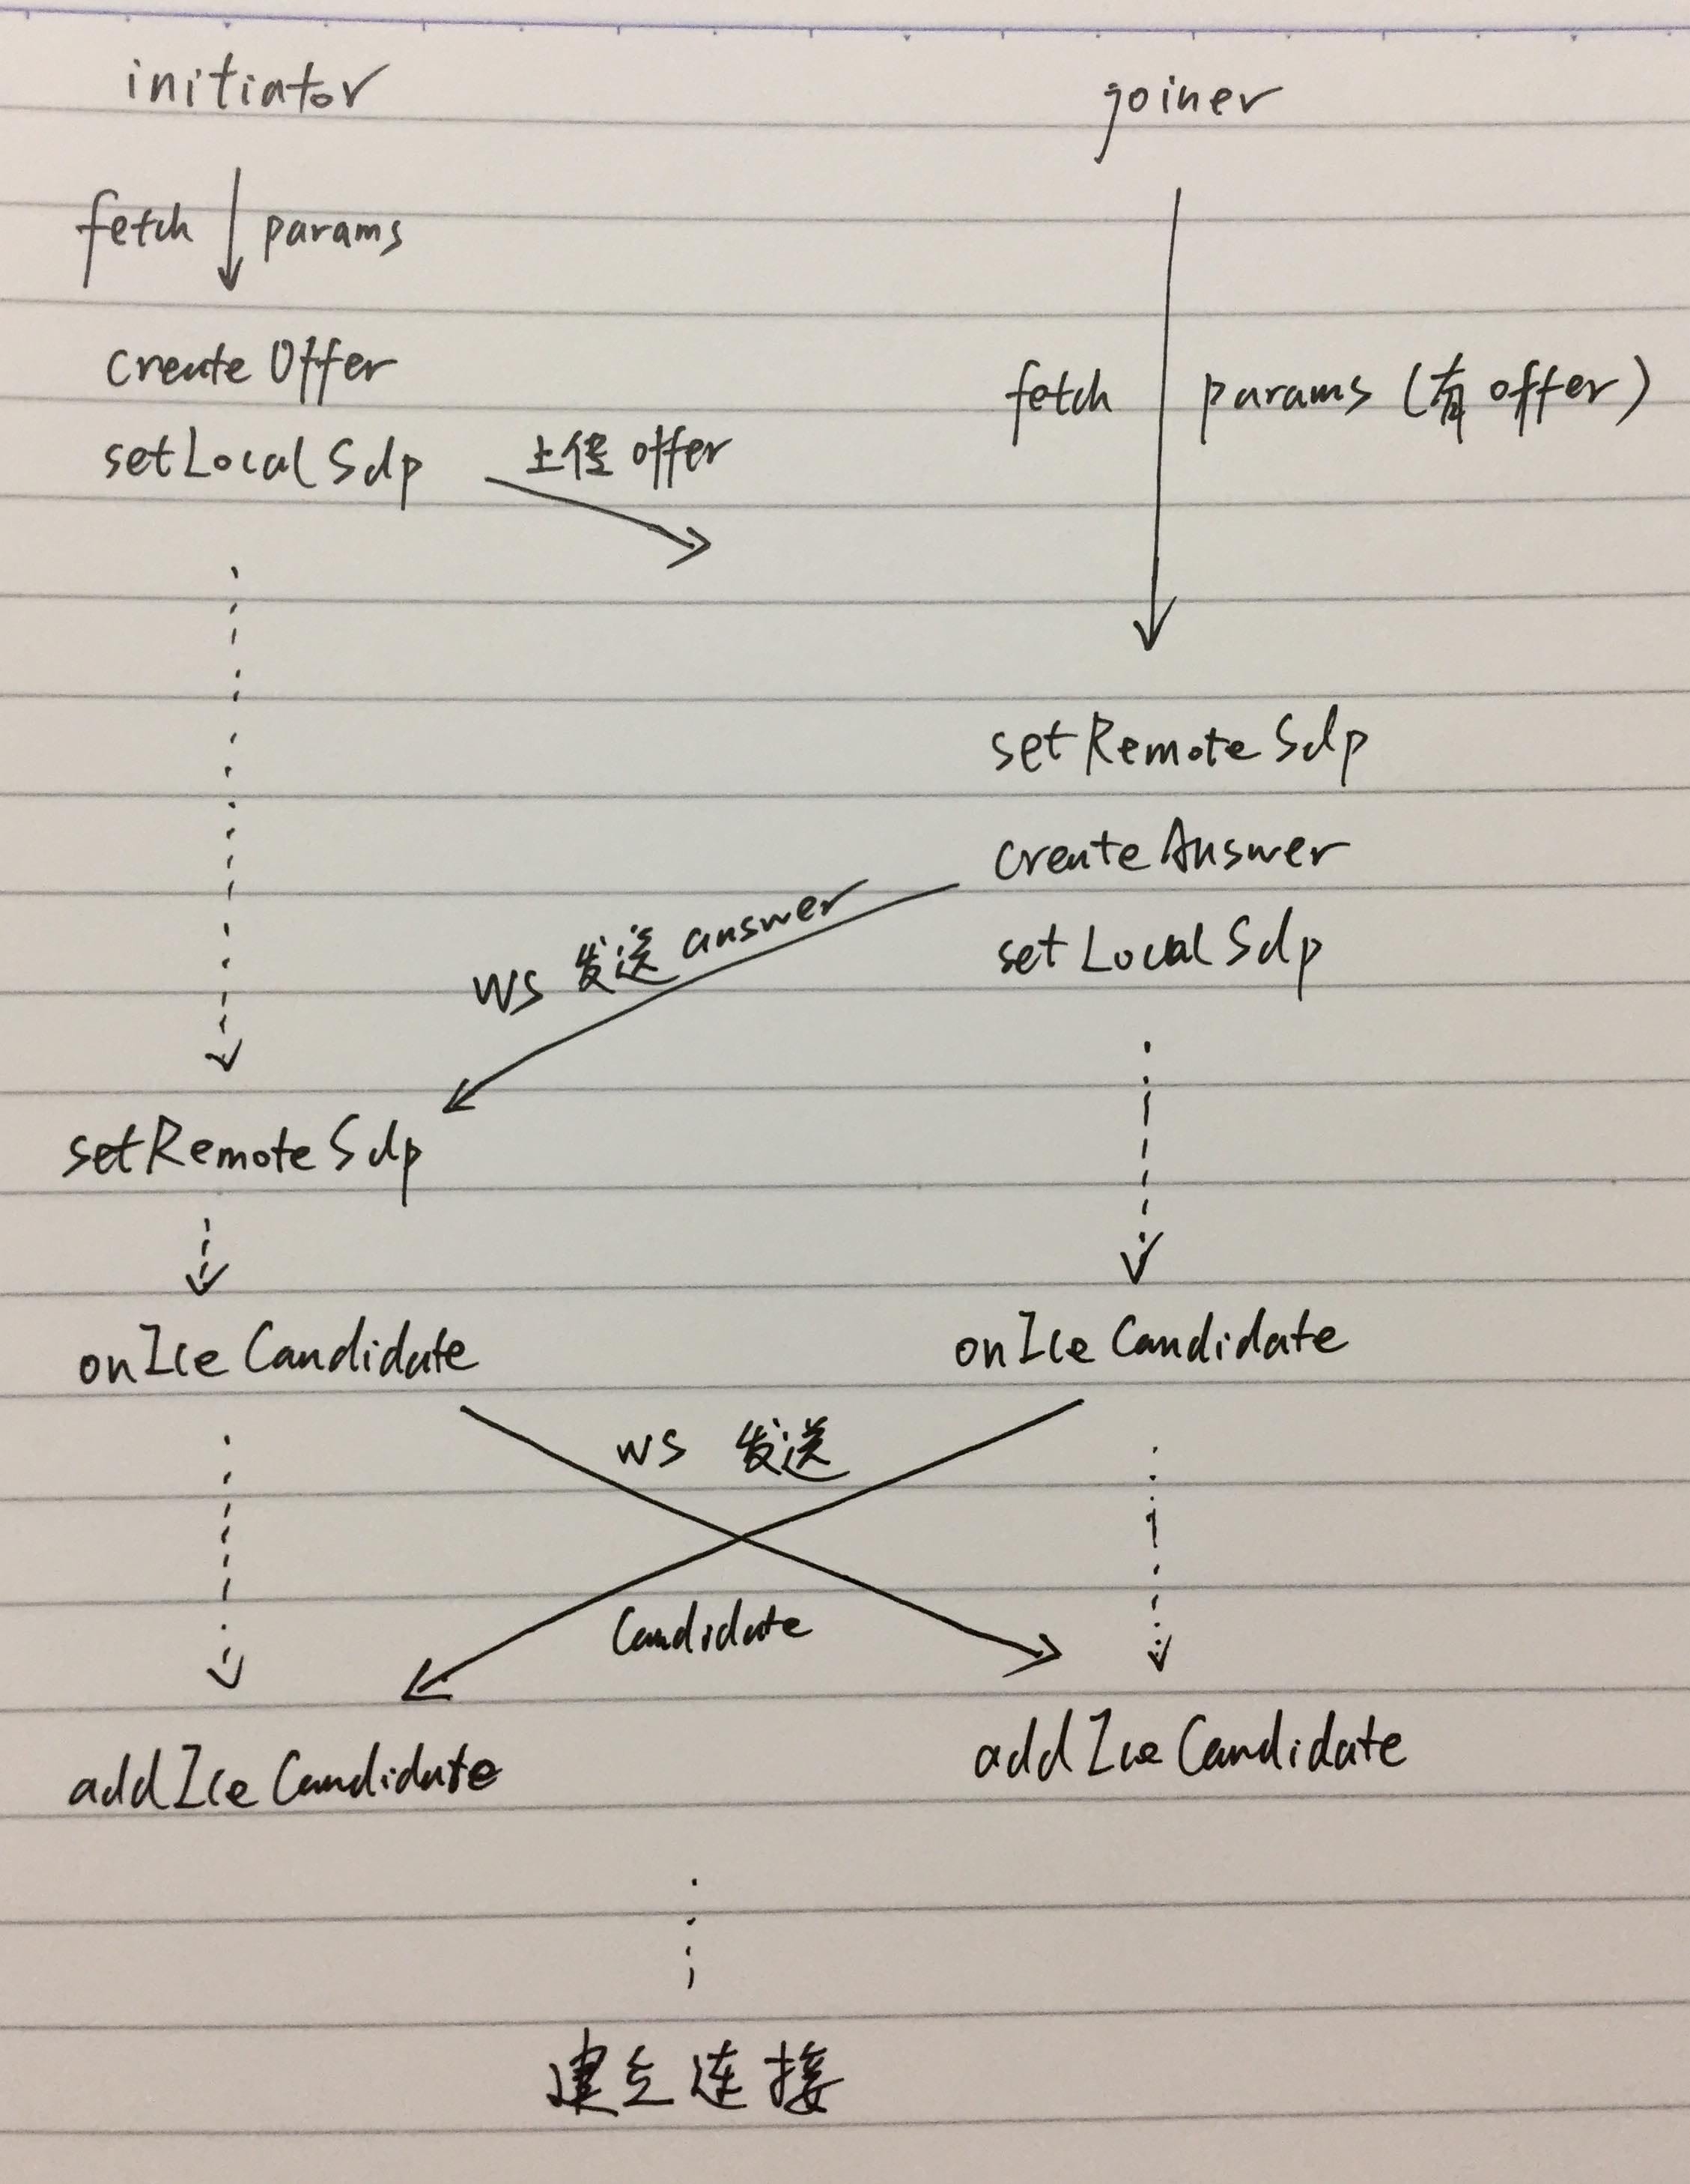
_isInitiator,调用_peerConnection offerForConstraints创建 offer,调用_peerConnection setLocalDescription设置 local sdp,调用self sendSignalingMessage通过长连接发送 offer - 否则调用
drainMessageQueueIfReady检查是否收到长连接消息,并在processSignalingMessage中处理 - 收到 offer/answer 后调用
_peerConnection setRemoteDescription设置 remote sdp;设置成功后,调用_peerConnection answerForConstraints创建 answer,设置 local sdp,并通过长连接发送 answer - 收到 ice candidate 后调用
_peerConnection addIceCandidate设置 candidate - 收到 bye 消息后,退出房间
- 创建
建立 P2P 连接的流程和安卓基本一致(附安卓流程图):
iceServers 配置的获取逻辑等同于下面的两次 HTTP 请求:
curl https://appr.tc/params,取得ice_server_url,例如https://networktraversal.googleapis.com/v1alpha/iceconfig?key=AIzaSyAJdh2HkajseEIltlZ3SIXO02Tze9sO3NY;curl -XPOST -H "referer: https://appr.tc" -d "" https://networktraversal.googleapis.com/v1alpha/iceconfig?key=AIzaSyAJdh2HkajseEIltlZ3SIXO02Tze9sO3NY取得 iceServers 配置:
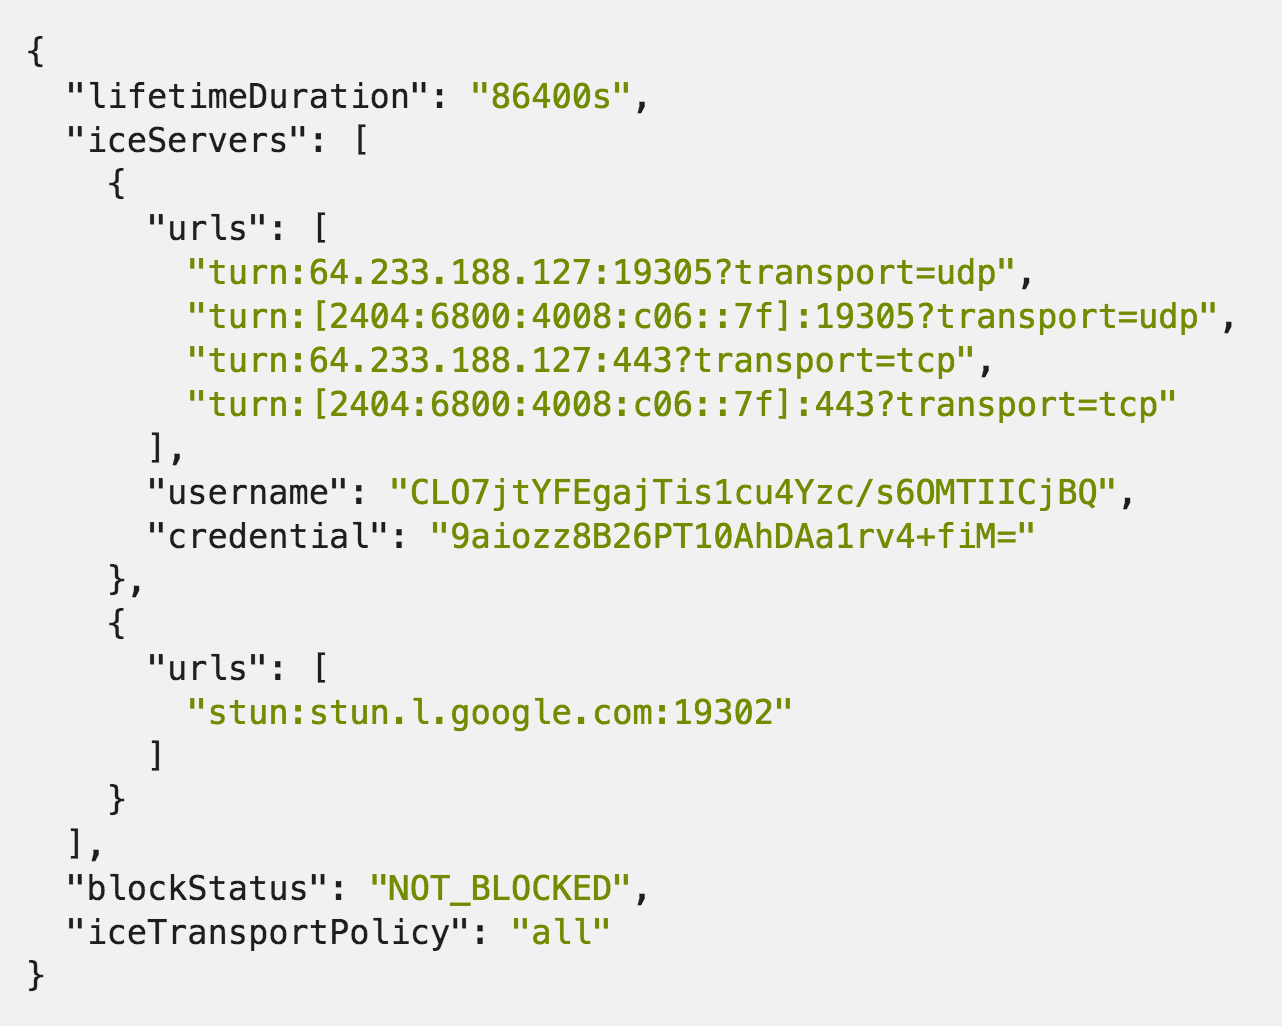
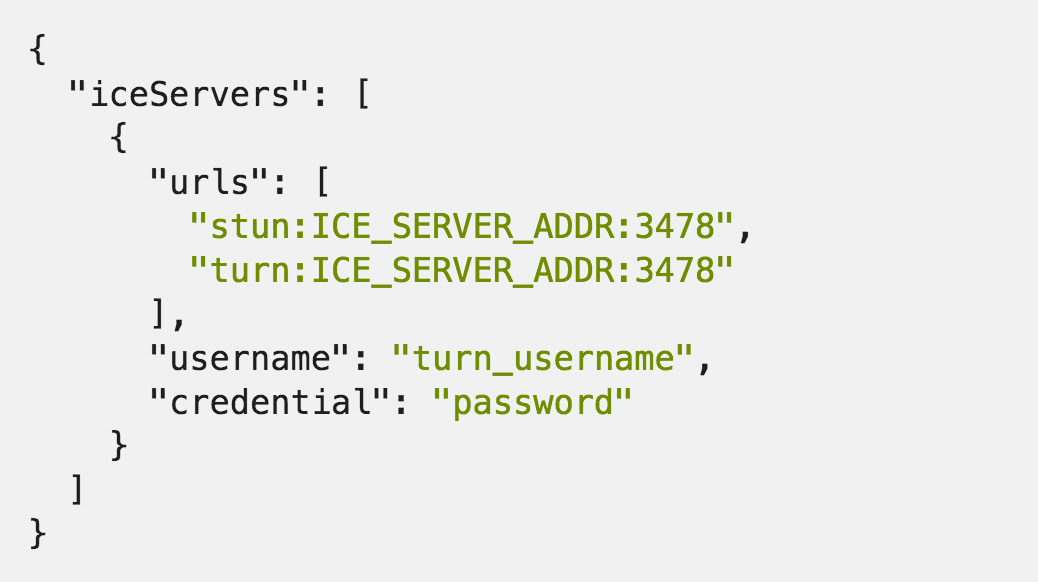
我们在开箱即用的 WebRTC 开发环境中部署的 ICE Server 其实就是直接返回 iceServers 配置的,它返回的数据类似如下:
DataChannel 使用
创建了 RTCPeerConnection 之后(在 ARDAppClient startSignalingIfReady 里),我们就可以创建 DataChannel 了,代码如下:
RTCDataChannelConfiguration* dcConfig = [[RTCDataChannelConfiguration alloc] init];
dcConfig.isOrdered = YES;
dcConfig.isNegotiated = YES; // NO is ok
dcConfig.maxRetransmits = -1;
dcConfig.maxPacketLifeTime = -1;
dcConfig.channelId = 3; // must be set, and >= 0
_dataChannel = [_peerConnection dataChannelForLabel:@"P2P MSG DC"
                                      configuration:dcConfig];
_dataChannel.delegate = self;
需要注意的是,从 22270~22642 之间的某次提交开始,必须设置 channelId(>= 0),且双方需要设置同一值,否则虽然消息在底层能收到,但会被丢弃掉,上层不会收到回调。
建立好 DataChannel 之后,就可以收发数据了。
- (void)sendMessage:(NSString *)message {
    RTCDataBuffer* buffer = [[RTCDataBuffer alloc]
        initWithData:[message dataUsingEncoding:NSUTF8StringEncoding]
            isBinary:NO];
    [_dataChannel sendData:buffer];
}
处理消息回调:
- (void)dataChannel:(nonnull RTCDataChannel *)dataChannel
        didReceiveMessageWithBuffer:(nonnull RTCDataBuffer *)buffer {
    NSString* message = [[NSString alloc] initWithData:buffer.data
                                              encoding:NSUTF8StringEncoding]
}
PS: 目前我对 iOS UI 编程尚不熟悉,所以 DataChannel 的使用没有 UI,代码在 dc_text_chat 分支。