原文链接 https://lingxiankong.github.io/2014-05-10-vmware-workstation-devstack.html
注:以下为加速网络访问所做的原文缓存,经过重新格式化,可能存在格式方面的问题,或偶有遗漏信息,请以原文为准。
(2017.09.11) 截止 Pike 版本,最新的 devstack 默认已经使用 systemd 管理各个服务,而不再使用 linux screen,而且大部分服务也都使用 uwsgi 的启动。关于 Systemd 的详细介绍,可以参加这里。所以要启动一个 openstack 进程,要经过
systemd-->uwsgi-->wsgi application(in codebase)-->codebase
安装vmware workstation
创建ubuntu虚拟机
下载ubuntu iso,网络模式nat(前提是本机能联网),安装过程不需要人工干预。
预配置虚拟机
用创建虚拟机时指定的用户登录,修改root登录密码:
sudo passwd
切换到root用户。修改apt源:
cp /etc/apt/sources.list /etc/apt/sources.list.bak
vi /etc/apt/sources.list
:%s/us.archive/cn.archive/g
更新软件:apt-get update
安装ssh:apt-get install openssh-server
安装vim: apt-get install vim
安装git: apt-get install git
查看虚拟机IP,然后在本机通过ssh登录,方便后续操作。
配置pip国内源,新建~/.pip/pip.conf文件,输入如下内容:
[global]
trusted-host = pypi.douban.com
index-url=http://pypi.douban.com/simple/
# 或者清华的源:index-url = http://mirrors.tuna.tsinghua.edu.cn/pypi/simple
重新以root身份登录,以使pip源生效。
至此,准备工作结束。强烈建议此时为虚拟机创建快照,避免后续操作失误后,有洁癖的童鞋又要重新安装。
安装devstack
假设后续都是在/openstack目录下操作。执行:
git clone git://github.com/openstack-dev/devstack.git
cd devstack
chmod +x tools/create-stack-user.sh
./tools/create-stack-user.sh #创建stack用户
chown -R stack:stack /openstack/devstack
su - stack
vi /openstack/devstack/localrc #新建localrc文件
输入如下内容(这里仅仅是参考,您可以根据需要自定义配置):
# Misc
# modify the IP address according to your own
HOST_IP=192.168.70.132
ADMIN_PASSWORD=Galax8800
DATABASE_PASSWORD=$ADMIN_PASSWORD
RABBIT_PASSWORD=$ADMIN_PASSWORD
SERVICE_PASSWORD=$ADMIN_PASSWORD
SERVICE_TOKEN=$ADMIN_PASSWORD

RECLONE=no
SERVICE_TIMEOUT=600
LOGDAYS=1

# Enable Logging
LOGFILE=/opt/stack/logs/stack.sh.log
VERBOSE=True
LOG_COLOR=False
SCREEN_LOGDIR=/opt/stack/logs

# Pre-requisite
ENABLED_SERVICES=rabbit,mysql,key
KEYSTONE_TOKEN_FORMAT=UUID

# Nova
ENABLED_SERVICES+=,n-api,n-crt,n-obj,n-cpu,n-cond,n-sch,n-novnc,n-cauth
#IMAGE_URLS+=",https://launchpad.net/cirros/trunk/0.3.0/+download/cirros-0.3.0-x86_64-disk.img"

#Horizon
ENABLED_SERVICES+=,horizon
# HORIZON_REPO=https://github.com/openstack/horizon

# Glance
ENABLED_SERVICES+=,g-api,g-reg

# Neutron
ENABLED_SERVICES+=,q-svc,q-agt,q-dhcp,q-l3,q-meta,neutron
# VLAN configuration
Q_PLUGIN=ml2
ENABLE_TENANT_VLANS=True
# GRE tunnel configuration
#Q_PLUGIN=ml2
#ENABLE_TENANT_TUNNELS=True
# VXLAN tunnel configuration
#Q_PLUGIN=ml2
#Q_ML2_TENANT_NETWORK_TYPE=vxlan

# Cinder
ENABLED_SERVICES+=,cinder,c-api,c-vol,c-sch,c-bak

# Heat - Orchestration Service
ENABLED_SERVICES+=,heat,h-api,h-api-cfn,h-api-cw,h-eng
#IMAGE_URLS+=",http://fedorapeople.org/groups/heat/prebuilt-jeos-images/F17-x86_64-cfntools.qcow2"

# Ceilometer - Metering Service (metering + alarming)
CEILOMETER_BACKEND=mysql
ENABLED_SERVICES+=,ceilometer-acompute,ceilometer-acentral,ceilometer-collector,ceilometer-api
ENABLED_SERVICES+=,ceilometer-alarm-notifier,ceilometer-alarm-evaluator

INSTALL_TEMPEST=False
保存文件,切换到/openstack/devstack目录下执行./stack.sh,根据本机网速,自动安装all-in-one的devstack环境.
看到下面这句话时,证明安装成功:
2013-10-01 06:15:12 stack.sh completed in 676 seconds.
此时,再次建议为虚拟机创建第二个快照,以便恢复
安装过程中的问题
screen attach出错
使用screen -r XXX时有时会出现:Cannot open your terminal '/dev/pts/2' - please check.的提示,不要急,使用如下方法解决:
使用root用户执行:
chown stack:stack `readlink /proc/self/fd/0`
可以把这个命令写入~/.bashrc文件末尾,这样第一次登陆shell时就会自动执行。
如果不想使用screen,则可以修改stackrc文件中的USE_SCREEN=False。
ceilometer-api启动失败
错误信息:AttributeError: 'module' object has no attribute 'MongoClient'。
解决方法:
pip install --upgrade pymongo
但问题没有解决,尝试重启ceilometer-api,又抛出如下错误:StorageBadVersion: Need at least MongoDB 2.4,看来是mongodb版本太低了,干脆,直接把Ceilometer的后端db改成MySQL(上面的配置里面已经是Mysql了)。
q-dhcp启动失败
错误信息:Unable to determine dnsmasq version. Please ensure that its version is 2.63 or above!,看了一眼dnsmasq的版本,还真的是不满足要求,但在ubuntu上如何升级dnsmasq?懒得去研究了。图个省事儿,直接改源码。在文件/neutron/agent/linux/dhcp.py的check_version函数中,其实以前判断到dnsmasq版本不满足要求时,不会退出,只会打印warning日志,只是Juno中将其改成了强制退出。于是,这里我直接回退这部分代码,版本不匹配时不强制退出。

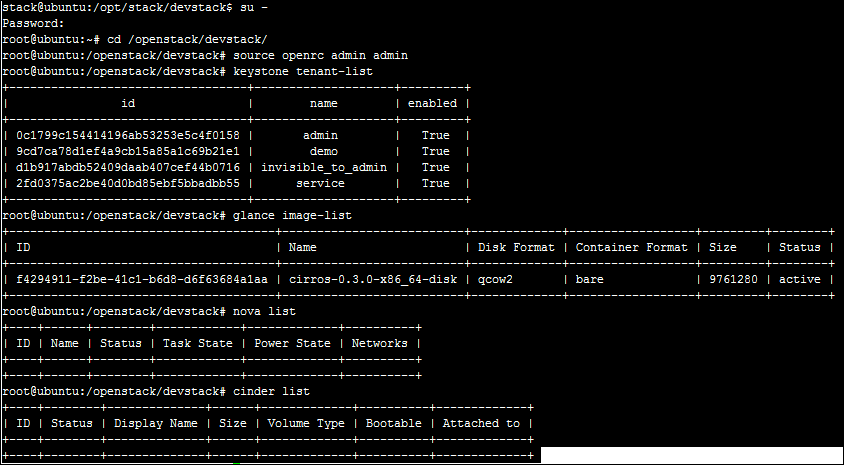
验证安装
按照下述步骤,看功能是否OK:
配置tempest
现在已经有了一个可运行的OpenStack环境,可将本机修改过的tempest工程通过winscp工具复制到ubuntu虚拟机上。假设是这个目录/openstack/code/tempest,我们需要一个tempest配置文件。执行:
cp /openstack/code/tempest/etc/tempest.conf.sample /openstack/code/tempest/etc/tempest.conf
根据你的devstack环境,主要修改其中的以下配置:
admin_password、image_ref
因为是在虚拟机中安装devstack,所以对于规格尽量占的资源少(主要是内存)因此修改数据库中的flavor:
mysql -uroot -ppassword
mysql> use nova;
mysql> update instance_types set memory_mb=100 where id=2;
一切就绪,启动tempest用例
root@ubuntu:/openstack/code/tempest# nosetests -v tempest.api.compute.admin.test_aggregates:AggregatesAdminTestJSON.test_aggregate_create_invalid_aggregate_name
刚执行时可能会出现有些python库没有安装,pip安装即可:
pip install testtools
pip install fixtures
pip install testresources